You are at - Jotaro's Blog / AhPek Biker / Bikes & Accessories / Bringing Folding Bikes Onto Malaysian Regular Intercity Trains
AhPek Biker - Riding Adventures
BRINGING FOLDING BIKES ONTO MALAYSIAN REGULAR INTERCITY TRAINS


You are at - Jotaro's Blog / AhPek Biker / Bikes & Accessories / Bringing Folding Bikes Onto Malaysian Regular Intercity Trains
I had earlier written on bringing folding bicycles onto the KTM's Komuter Train that serves the Klang Valley, the Komuter runs up to Tanjung Malim in the north and down to Sungai Gadut in the south. KTM stands for Keretapi Tanah Melayu meaning Peninsular Malaysia Train Service. I have also written on bringing foldies onto the Electric Train Services (ETS), a fast electric powered train that serves the line between Kuala Lumpur and Ipoh.
UPDATE: KTM regularly expends their services, the Commuter & the ETS now has more routes. Please go to the blogs on this services for regular updates.
UPDATE: From 19th May 2016 the sleeper train service up to Hat Yai has been cancelled. It now reaches to Padang Besar only.
This is where KTM's regular diesel powered train comes in. These are slower trains that stop at more stations even at many smaller towns.
(Online booking of tickets can be done on line at https://intranet.ktmb.com.my/e-ticket/login.aspx. One needs to register as a member first).
 |
| Train Timetable for KTM's North-South Line, click here for link to this time-table. |
KTM operates several lines that serves the North and South of Peninsular Malaysia with the central hub at Kuala Lumpur (KL) Sentral. The faster train is called the Expres Rakyat, an express train as it stops at only half the transit towns. It has one train that runs daily between Butterworth and Woodlands, Singapore; see the above time-table for time and details.
KTM also runs a few slower "mail" train lines that stops at almost all transit towns. Two trains run daily between KL Sentral and Woodlands and are called the Sinaran Selatan and Sinaran Sutera; one is a morning train whilst the other is an evening.
UPDATE (10-07-2015)
This train does not terminate it's route at Woodlands, Singapore any more. Instead the train ends at JB Sentral. A new service, the Tebrau Shuttle train runs from JB Sentral to Woodlands.

Tickets purchased from through KTM Intranet for the JB Sentral to Woodlands route is at RM5-00 (price is at time of this blog).
____________________
Only one evening mail train, the Senandung Langkawi serves between KL Sentral up to Haatyai, Thailand. Should one wish to travel up to Bangkok, Thailand; there is the Expres Antarabansa (International Express) that runs once daily between Butterworth and Bangkok.
To plan a journey all the way between Bangkok or KL Sentral and Singapore, kindly study the above schedule carefully as connecting trains may have a long time lapse between on train reaching and the other train leaving, and you may have to spend a night at one of the transit town/city.
 |
| Train Timetable for KTM's East-South Line, click here for link to this time-table. |
There is also an East-South service that runs between Tumpat, Kelantan and KL Sentral; and also another service that runs between Tumpat and Woodlands, Singapore.
 |
| (Click here for link to KTM's Mail Train Fare) |
Above is the train fare schedule for the North Line between KL Sentral to Haatyai, Thailand. Please note that the basic fare is for economy class and to add supplementary charges for upgrading to another class or to include a sleeping berth. As this is an overnight train, it is worthwhile to get a berth for a more restful journey.
 |
| (Click here for link to KTM's Mail Train Fare) |
Above is the train fare schedule for the South Line between KL Sentral to Woodlands, Singapore. Please note that the basic fare is for economy class and to add supplementary charges for upgrading to another class or to include a sleeping berth.
For more accurate and up-to-date fares, go to KTM on-line booking site: https://intranet.ktmb.com.my/e-ticket/login.aspx
NOTE: For individual coaches seating arrangement & berth coach arrangement, please click here.
About twenty of us went on a bike-packing adventure starting with a train ride on the Senandung Langkawi from Kuala Lumpur to Parit Buntar. Based on our train travel, I pen some notes here which I trust will be helpful for cyclists who wants to use the train as part of their cyclo-adventure.
1. COURTESY
- Always remember that we are not the only people travelling on the trains.
- Try not to be a nuisance to other travellers by being quiet as some may be taking a snooze.
- Do not obstruct the aisle of the train. If this is not possible, give way to other passengers when needed.
 - Be courteous with the train staff whether it be the station-master or a porter, remember that they are just doing their job. Rudeness will get one nowhere and there is no point arguing unnecessarily.
2. Try to be as knowledgeable of train regulations as possible. Click here for the link to the rules & regulations posted by KTM. This link may not work as their posting is updated regularly, alternatively go to KTM's Home Page and at the top click on "Terms & Conditions". From the pull down menu select "Syarat-syarat Pengankutan Penumpang".
3. The particular regulation that pertains to taking your foldies onto the train is Section 6, Clause 30 (2). Part of this reproduced below:
 Roughly translated it states : "Folding bicycles, prams, wheel-chairs are allowed onto the train. The railway personnel may disallow this if in their opinion there is inadequate space on the train to put these; or if bringing them onto the train will delay the train."
4. Even with this regulations, the railway on board ticket-inspector may attempt to charge RM10/= per bicycle. Do not give in to this as it is within our right to bring our foldies onto the train. Courteously explain to the personnel these regulations. It would be good to keep a copy of the above section of the regulations for this purpose.
 While on our journey up to Parit Buntar, the ticketing-inspector checked our tickets and wanted to charge us RM10/= for each bike. We grumbled about it, stating that folding bicycles are not chargeable as per their regulations. In the end, he suggested charging us RM40-00 for all our bicycles. No wanting to make an fuss out of it, we just paid as it worked out to be about RM2-00 per bicycle.
3. The particular regulation that pertains to taking your foldies onto the train is Section 6, Clause 30 (2). Part of this reproduced below:
4. Even with this regulations, the railway on board ticket-inspector may attempt to charge RM10/= per bicycle. Do not give in to this as it is within our right to bring our foldies onto the train. Courteously explain to the personnel these regulations. It would be good to keep a copy of the above section of the regulations for this purpose.
5. Bag your bikes.
It is a regulation to bag your bikes your bikes. Although sometimes during off-peak period bikes may be allowed onto trains without bagging, do not take the risk; bring your bike bags along just in case.
6. Book your ticket early, especially during holiday or festive seasons, BUT bear in mind that tickets can only be booked earliest one month prior to the travel date AND time. For on-line booking go to KTM website - https://intranet.ktmb.com.my/e-ticket/login.aspx; one need to register as a member first.
7. For long over-night travel, getting a sleeping berth will make your journey more comfortable and relaxing. Try to purchase sleeping berths as soon as they are opened for booking as these berths are snapped up within a couple of days. Booking for berths opens a month before the scheduled train run.
 Coach with sleeping berths have curtains to ensure privacy while one sleeps.
6. Book your ticket early, especially during holiday or festive seasons, BUT bear in mind that tickets can only be booked earliest one month prior to the travel date AND time. For on-line booking go to KTM website - https://intranet.ktmb.com.my/e-ticket/login.aspx; one need to register as a member first.
7. For long over-night travel, getting a sleeping berth will make your journey more comfortable and relaxing. Try to purchase sleeping berths as soon as they are opened for booking as these berths are snapped up within a couple of days. Booking for berths opens a month before the scheduled train run.
8. It is best to book seats numbers 1A or 1B at one end of the coach, or 15C or 15D at the other end; as there is a large space in front of these seats to put you bicycles.


9. For sleeping berths, book the lower bunks, then one don't have to climb up and down.

But more importantly, the lower bunk has a railing that one can lock on bicycle onto with a strap:
 Please note that the sleeping berths are quickly snapped up within a couple of days after the tickets are opened for sale. So it's best to book the berths a soon as possible.
10. NOTE that NO announcements will be made just prior to reaching a station. If you intend to sleep, it's best to set the alarm based on the arrival time at the station prior to your destination station. This will give adequate time to start preparing yourselves and your bikes to disembark as the train only stops for a few minutes at each station.
11. Depending on the direction of travel, one may disembark from the train onto a platform away from the exit point of the station. There are pedestrian bridges spanning above the railway tracks to connect over to the exit gates.
 At most large stations there are lifts going up to the pedestrian bridges. Take advantage of these so as to avoid carrying your bikes up and down the staircases.
12. Generally, these regular trains, being older re-furbished trains, are not as sparkling clean as the Commuter or the ETS trains. Facilities provided on board are:
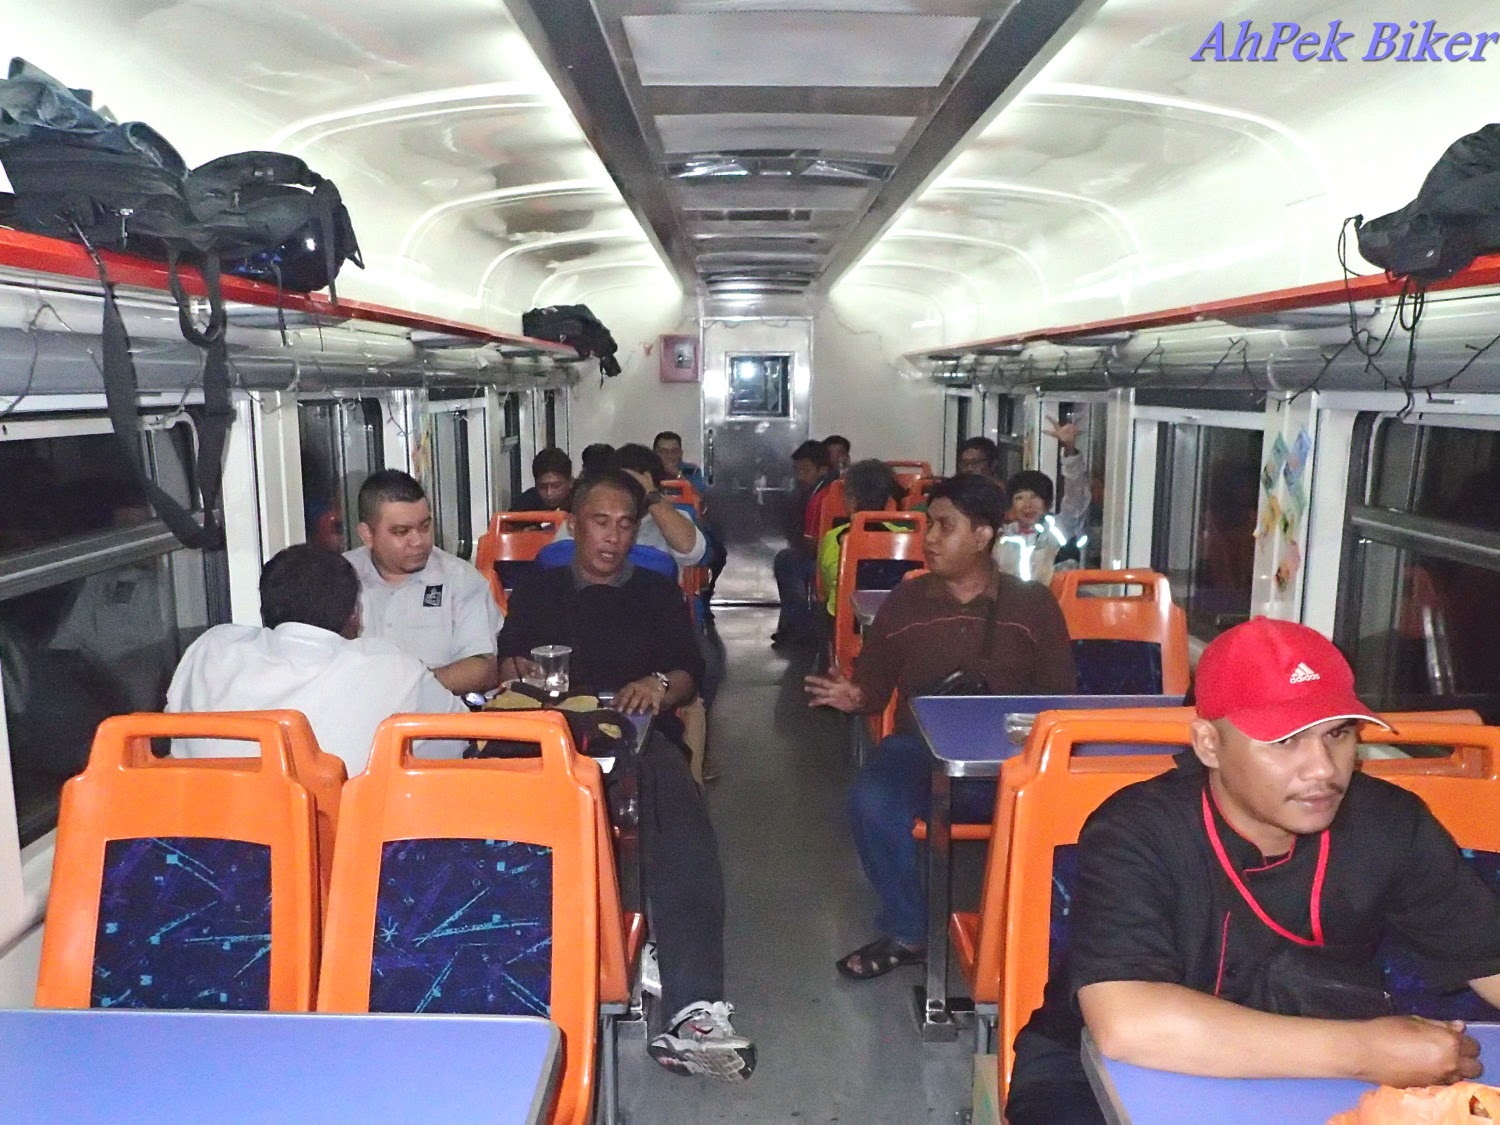 This being a long journey train, a dining coach is provided with proper tables and chairs.
 This diner coach has a service counter that serves pre-packed meals, and which also takes order for meals freshly and warmly prepared by an adjoining galley.
 On-wall menu for food & drinks (Pricing is at time of this blog).
 More of the on-wall menu.
13. The train is air-conditioned and it does get pretty cold inside, so do be prepared with sweaters and the like. Also cabin lights are not switched off; if you are not used to sleeping in the bright, eye-masks, etc. will be helpful
 I was travelling light and used a Pashmina cashmere shawl and a Uniqlo Heattech pants; although thin, these kept me warm quite well.
14. The train toilets are not as clean as those provided by the ETS. This is one area of improvement that KTM could look into.


The second best seats are the other pair of seats facing the ends of the coach, they may not have as large a space but one can still put one's bicycles at the wider leg space provided.
Above photo shows seating at 15A &15D with wider leg-room that can be used to put bicycles.
Other seats in between these have just enough leg room, and bicycles will have to be put onto the aisle, thus blocking walking space.
But more importantly, the lower bunk has a railing that one can lock on bicycle onto with a strap:
11. Depending on the direction of travel, one may disembark from the train onto a platform away from the exit point of the station. There are pedestrian bridges spanning above the railway tracks to connect over to the exit gates.
12. Generally, these regular trains, being older re-furbished trains, are not as sparkling clean as the Commuter or the ETS trains. Facilities provided on board are:
13. The train is air-conditioned and it does get pretty cold inside, so do be prepared with sweaters and the like. Also cabin lights are not switched off; if you are not used to sleeping in the bright, eye-masks, etc. will be helpful
14. The train toilets are not as clean as those provided by the ETS. This is one area of improvement that KTM could look into.
Travelling by the regular KTM trains may not be as comfortable as the ETS but it is a good way to go further. The added advantage is that it stops at smaller towns too; towns just waiting for us to explore and find out what they have to offer.
The following are useful web-sites with regards to travelling by train:
1. Railtravelstation.com - this site gives very comprehensive information on KTM's services.
2. Wikipedia on Keretapi Tanah Melayu - this gives some useful information on the history of the railway, some routes, rolling stock, etc.
2. Wikipedia on Keretapi Tanah Melayu - this gives some useful information on the history of the railway, some routes, rolling stock, etc.
3. KTM E-ticketing - for purchasing tickets on line. Note: you will have to register as a member, registration is free. This DOES NOT include the commuter trains.
4. Official Keretapi Tanah Melayu (KTM) Website - the official site with links to the various services offered by the railway and more importantly their latest announcements.
5. KTM ETS Intercity Train Timetable - schedule showing time of departure and arrival of the ETS trains at respective stations.
5. KTM ETS Intercity Train Timetable - schedule showing time of departure and arrival of the ETS trains at respective stations.
6. KTM North-South Route Timetable - Timetable for normal trains from Hatyai in Thailand to Woodlands in Singapore by the normal & express trains.
9. KTM East-West Route Timetable - Timetable for trains travelling along the east coast of Peninsular Malaysia; from Tumpat in Kelantan to Woodlands in Singapore.
NOTE: for those travelling from the West Coast to the East Coast, there would be a necessity to change trains at the Gemas Station.
11. Klang Valley Transit Map - a PDF map showing the eight railway lines servicing the Klang Valley and the various stations en-route. This include the ERL, the line from Sentral to Kuala Lumpur International (KLIA) airport.
12. KTM Komuter - for trains from Sentral up to Rawang in the north and Sungai Gadut in the south. With links for route, timetable and fares.
13. KTM Komuter Time-table - Times of train arriving at various station along the lines.
14. KTM Komuter Fare Schedule - a PDF chart showing the fares between the various stations.
15. Express Rail Service (ERL) - Link to the express rail service from Sentral to Kuala Lumpur International (KLIA & KLIA2)
16. Touch n' Go Card - Link to this debit card that can be used for transit.


 |
| Gaharu Tea Valley, Gopeng, Perak : July 2014 A 22-year old plantation of the precious agarwood, now only becoming renown through eco-tourism. |
 |
| Gallery - KevinTheBigCity Tattoos, Kuala Lumpur : July 2014 A look at a young man's simple but meaningful tattoos. |
 |
 |
 |
 |
 |
If you like this, view my other blogs at Jotaro's Blog
(comments most welcomed below. if you like this pls share via facebook or twitter)
(comments most welcomed below. if you like this pls share via facebook or twitter)


