You are at - Jotaro's Blog / AhPek Biker / Bikes & Accessories / Bringing Folding Bikes Onto Malaysian ETS Intercity Trains
AhPek Biker - Riding Adventures
BRINGING FOLDING BIKES ONTO MALAYSIAN ETS INTERCITY TRAINS

ETS tickets can be booked on-line on month prior to the time of travel. For on-line booking go to KTM website - https://intranet.ktmb.com.my/e-ticket/login.aspx; one need to register as a member first.
ETS TRANSIT STOPS

 (Click here to download a PDF file for the Timetable & Fares)
ETS FARE FOR KUALA LUMPUR=IPOH
 (Click here to download a PDF file for the Timetable & Fares)


IMPORTANT REGULATION TO NOTE


Related Blogs :
You are at - Jotaro's Blog / AhPek Biker / Bikes & Accessories / Bringing Folding Bikes Onto Malaysian ETS Intercity Trains
A few biking buddies and me took the Malaysian Intercity train from Kuala Lumpur to Kampar. There we were met by a couple of local friends and rode onwards to Ipoh (... see Kampar to Ipoh blog).
Yes! Travelling by train to further away places and meeting friends there is a great biking adventure. I had previously wrote on bringing foldies onto Malaysian Commuter trains (... see blog)that serves the Klang Valley; and as promised I pen here some pointers and tips on travelling by the Intercity Electric Train Service (ETS).
For travelling with foldies on the regular diesel Intercity trains that serves up to Haatyai, Thailand in the north and down to Singapore in the south, click here.
UPDATE (10-07-2015)
As of 10-07-15 The ETS now operates from Gemas to Padang Besar.
Click here to view the updated blog on bringing foldies onto these new ETS Class 93 trains.
This blog here, is still relevant for routes that use the older Class 92 trains.
ETS TRANSIT STOPS
The ETS runs the electric rail service from Kuala Lumpur to Ipoh and back with minimum short transit stops along its line as shown below:
Kuala Lumpur Sentral>Kuala Lumpur>Kepong Sentral>Sungai Buloh>Rawang>Kuala Kubu Baru>Tanjung Malim>Behrang>Slim River>Sungkai>Tapah Road>Kampar>Batu Gajah>Ipoh.
There are two services, the Gold & Silver. The Gold Service fare is higher but has less stops, it does not stop at Sungai Buloh & Kuala Kubu Baru.
ETS TIME SCHEDULE FOR KUALA LUMPUR-IPOH

ETS FARE FOR KUALA LUMPUR=IPOH

GOOD SEATING POSITIONS FOR FOLDING BIKES
It is always best to seat with our bikes nearby so that we can keep an eye on them, for the ETS Intercity train, it is best to book a seat in Coach E or B.
Between Coaches D & E, and Coaches A & B are the disabled toilets, and the left-rear seats (14A &14B) has a space with a railing for the disabled wheelchair.
When no wheel chair is occupying this space, it is handy for putting bicycles, either lying on the floor or standing strapped to the railing.
The corridor in front of the disabled toilet is also fairly wide, and a few bicycles can be placed there. ONLY do this if a disabled person is not using Coach E.
It is also better to strap your bicycles to the railing, preferably at two points so as to prevent the bike from swinging outwards or topple over - one point at the seat post, the other at the front of the horizontal post. For more details on this see Securing The Brompton #2 Blog.
A Second Good Location to put bikes will be at the other end of the train where there is also ample space in front of seats 2C & 2D for all coaches. However these locations does not have railings to secure your bike onto, so do find some innovative way to restrain the bikes when the train moves. Other than Coaches B & E, the seats in front of seats 14A &14B have space to put bicycles without the railings.
IMPORTANT REGULATION TO NOTE
The particular regulation that pertains to taking your foldies onto the train is Section 6, Clause 30 (2). Part of this reproduced below:
Roughly translated it states : "Folding bicycles, prams, wheel-chairs are allowed onto the train. The railway personnel may disallow this if in their opinion there is inadequate space on the train to put these; or if bringing them onto the train will delay the train."
Even with this regulations, the railway on board ticket-inspector may attempt to charge RM10/= per bicycle. Do not give in to this as it is within our right to bring our foldies onto the train. Courteously explain to the personnel these regulations. It would be good to keep a copy of the above section of the regulations for this purpose.
"While on our journey up to Kampar, the ticketing-inspector checked our tickets and wanted to charge us RM10/= for each our bike. Fortunately, our ride leader showed her the regulations. She grumbled that there were six bicycles; we told her that it's only one bike for each of us and that they were not obstructing the aisles."
Let's look at some other points that will possibly ease travelling with your bike on these intercity trains.
1. COURTESY
- Always remember that we are not the only people travelling on the trains.
- Try not to be a nuisance to other travellers by being quiet as some may be taking a snooze.
- Do not obstruct the aisle of the train. If this is not possible, give way to other passengers when needed.
 - Be courteous with the train staff whether it be the station-master or a porter, remember that they are just doing their job. Rudeness will get one nowhere and there is no point arguing unnecessarily.
2. Try to be as knowledgeable of train regulations as possible. Click here for the link to the rules & regulations posted by KTM. This link may not work as their posting is updated regularly, alternatively go to KTM's Home Page and at the top click on "Terms & Conditions". From the pull down menu select "Syarat-syarat Pengankutan Penumpang".
3. Bag your bikes.
It is a regulation to bag your bikes your bikes. Although sometimes during off-peak period bikes may be allowed onto trains without bagging, do not take the risk; bring your bike bags along just in case.
4. Book your ticket early, especially during holiday or festive seasons, BUT bear in mind that tickets can only be booked earliest one month prior to the travel date. For on-line booking go to KTM website - https://intranet.ktmb.com.my/e-ticket/login.aspx; one need to register as a member first.
5. If travelling in a large group, it could be a good idea to spread out your seating to several coaches so as not to cause obstruction to other passengers.
6. Announcements will be made just prior to reaching a station. This will be a good time to start un-strapping your bikes and prepare to disembark as the train stops for only a short while.
7. Depending on the direction of travel, one may disembark from the train onto a platform away from the exit point of the station. There are pedestrian bridges spanning above the railway tracks to connect over to the exit gates.
 At most large stations there are lifts going up to the pedestrian bridges. Take advantage of these so as to avoid carrying your bikes up and down the staircases.
8. Travelling by the ETS Intercity train is very convenient as:
 The coaches are clean and brightly lit with comfortable seats which can partially reclined. Passengers can easily snooze along the journey.
 Video movies entertainment is provide on flat TV screens located at the front and back of each coach.
 These TV screens also shows the time and speed of the train periodically.
 At Coach C is a small cafeteria with counter-style sitting.
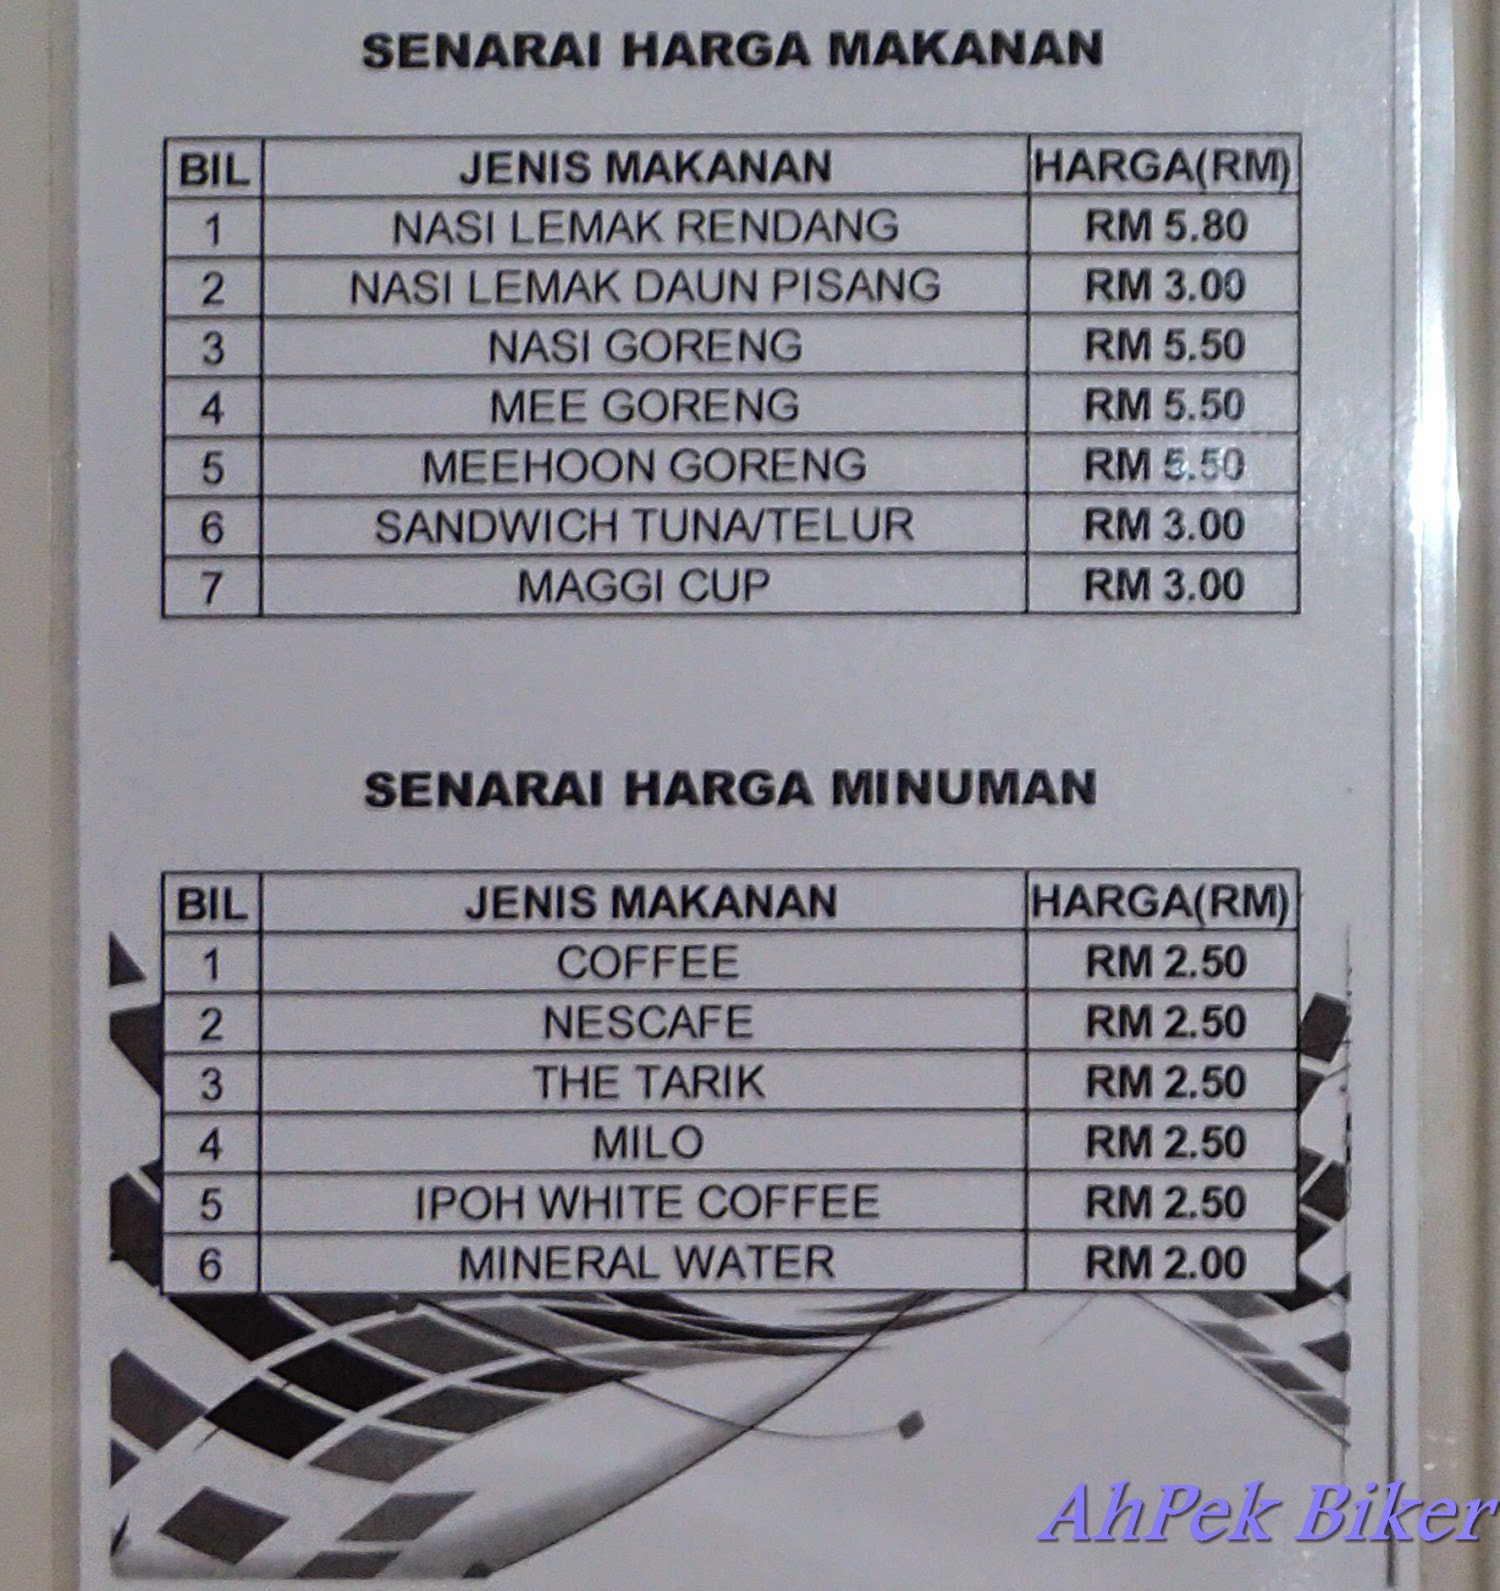 The menu/price list of food & drinks served at the Cafe. Note: pricing is at time of this blog.
 The toilets are clean and brightly lit too.
I do encourage travelling by KTM's ETS Intercity train as part of a cyclo-adventure. One can just pop off at any of the scheduled transit stops and start riding; and then take the train back from another station. Or stay overnight to explore nearby areas and return home the next day.
Whichever the case is RIDE WELL & RIDE SAFE; enjoy yourselves.
Should you have similar experience with travelling via the ETS, and have some tips to give do feel free to comment and let us know.
4. Book your ticket early, especially during holiday or festive seasons, BUT bear in mind that tickets can only be booked earliest one month prior to the travel date. For on-line booking go to KTM website - https://intranet.ktmb.com.my/e-ticket/login.aspx; one need to register as a member first.
5. If travelling in a large group, it could be a good idea to spread out your seating to several coaches so as not to cause obstruction to other passengers.
6. Announcements will be made just prior to reaching a station. This will be a good time to start un-strapping your bikes and prepare to disembark as the train stops for only a short while.
7. Depending on the direction of travel, one may disembark from the train onto a platform away from the exit point of the station. There are pedestrian bridges spanning above the railway tracks to connect over to the exit gates.
8. Travelling by the ETS Intercity train is very convenient as:
 |
| Ipoh Railway Station |
Whichever the case is RIDE WELL & RIDE SAFE; enjoy yourselves.
Should you have similar experience with travelling via the ETS, and have some tips to give do feel free to comment and let us know.
The following are useful web-sites with regards to travelling by train:
1. Railtravelstation.com - this site gives very comprehensive information on KTM's services.
2. Wikipedia on Keretapi Tanah Melayu - this gives some useful information on the history of the railway, some routes, rolling stock, etc.
2. Wikipedia on Keretapi Tanah Melayu - this gives some useful information on the history of the railway, some routes, rolling stock, etc.
3. KTM E-ticketing - for purchasing tickets on line. Note: you will have to register as a member, registration is free. This DOES NOT include the commuter trains.
4. Official Keretapi Tanah Melayu (KTM) Website - the official site with links to the various services offered by the railway and more importantly their latest announcements.
5. KTM ETS Intercity Train Timetable & Fares - this is a link to download PDF file for the time-table & fares.
5. KTM ETS Intercity Train Timetable & Fares - this is a link to download PDF file for the time-table & fares.
6. KTM North-South Route Timetable - Timetable for normal trains from Hatyai in Thailand to Woodlands in Singapore by the normal & express trains.
9. KTM East-West Route Timetable - Timetable for trains travelling along the east coast of Peninsular Malaysia; from Tumpat in Kelantan to Woodlands in Singapore.
NOTE: for those travelling from the West Coast to the East Coast, there would be a necessity to change trains at the Gemas Station.
11. Klang Valley Transit Map - a PDF map showing the eight railway lines servicing the Klang Valley and the various stations en-route. This include the ERL, the line from Sentral to Kuala Lumpur International (KLIA) airport.
12. KTM Komuter - for trains from Sentral up to Rawang in the north and Sungai Gadut in the south. With links for route, timetable and fares.
13. KTM Komuter Time-table - Times of commuter trains arriving at various station along the lines.
14. KTM Komuter Fare Schedule - a PDF chart showing the fares between the various stations.
15. Express Rail Service (ERL) - Link to the express rail service from Sentral to Kuala Lumpur International (KLIA & KLIA2)
16. Touch n' Go Card - Link to this debit card that can be used for transit.
Related Blogs :
 |
You may also like :
 |
 |

 |
 |
 |
| Gaharu Tea Valley, Gopeng, Perak : July 2014 A 22-year old plantation of the precious agarwood, now only becoming renown through eco-tourism. |
 |
 |
| Gallery - KevinTheBigCity Tattoos, Kuala Lumpur : July 2014 A look at a young man's simple but meaningful tattoos. |
 |
 |
 |
 |
 |
 |
 |
If you like this, view my other blogs at Jotaro's Blog
(comments most welcomed below. if you like this pls share via facebook or twitter)
(comments most welcomed below. if you like this pls share via facebook or twitter)